Puppeth makes deploying and managing a clique Proof of Authority network much less painful.
Creating a private blockchain is not a trivial task presently. It takes a lot of time and effort to get the network deployed. While services are coming out which makes this task much less complicated, there are some instances where your administrators want control over the private network and full ability to run and maintain it internally. To do this 100% by hand would be exceptionally time consuming, if it weren’t for a handy tool by the Ethereum group called “puppeth”.
Puppeth makes deploying and managing a Proof of Authority network much less painful, but there is a lot of pre-work to getting the network up and running. It requires setting up your servers for your nodes and setting the security right. Then comes the steps of actually getting them to talk to each other. The puppeth tool makes the job go from a week’s set up to a day to launch a full-scale Proof of Authority network on your own.
For the purpose of this article, I’m going to focus solely on AWS to launch the network. This is not a limitation of puppeth, it just makes writing this easier. You can launch your nodes anywhere, and in an ideal scenario, the nodes will exist across data centers and organizations. This article also focuses specifically on launching the network and the tools provided by puppeth. Once it’s up, it’s up to you to decide what to do with it.
I want to thank my good friend Corey Petty for helping me with my first installation. I would also like to thank Patrick Jang of Dynamo Technologies for working with me to iterate on our notes over and over to improve clarity. Without their assistance this tutorial would not be in the refined state that it is.
Pre-game Set-Up
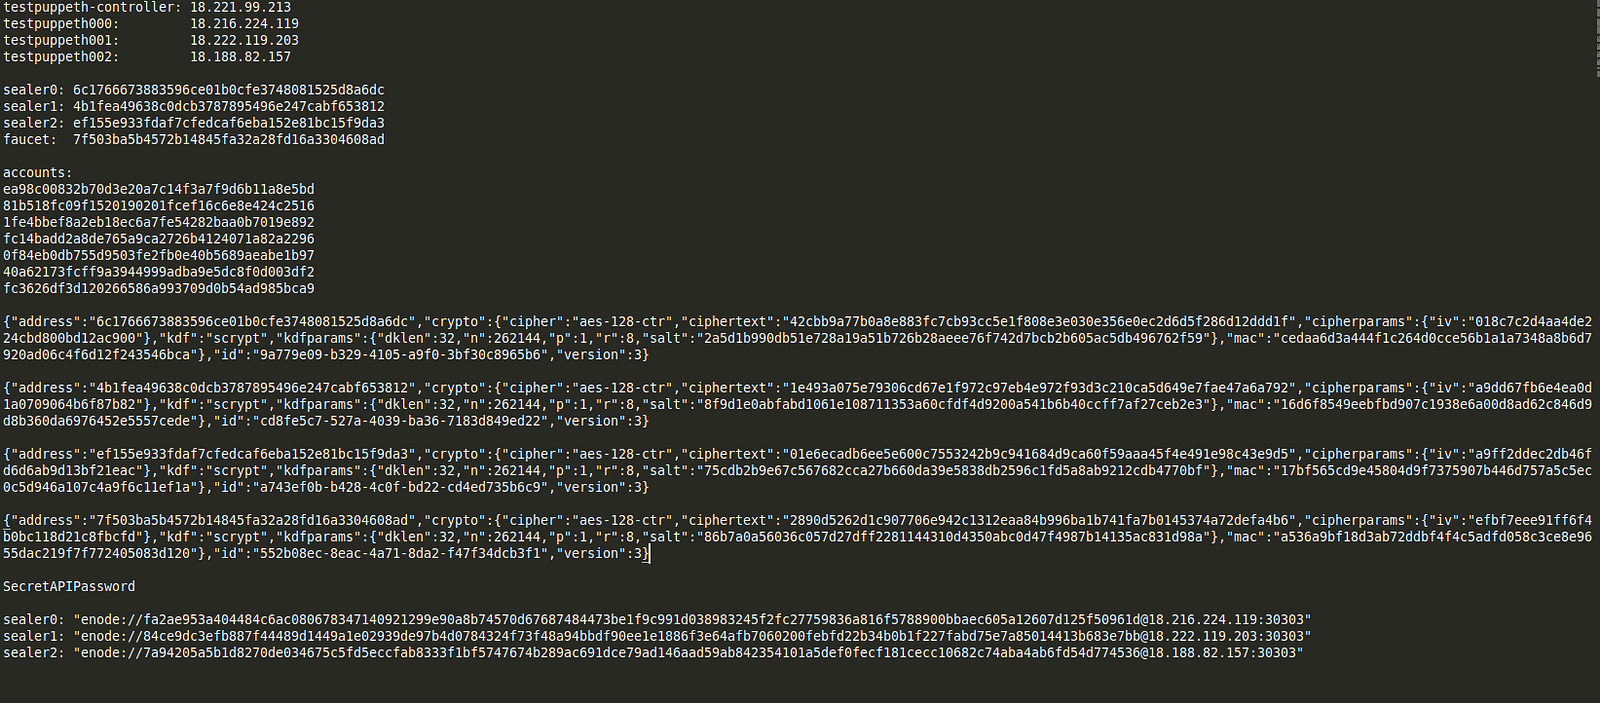
Before you get started, you’ll want to make sure you have a file for storing notes ready on your local machine. Keeping notes of certain values is absolutely essential for success. Throughout the tutorial I will tell you exactly what notes to record and why. In the end you will have a notes file that looks like this:

I’m going to assume you’ve already set up a keypair to log into your instances and named it “idchain.pem”. It could be named whatever you set it, and can be another existing keypair. When I reference “idchain.pem”, just mentally replace it with whatever keypair you need to log into that server. On your local machine, make sure to chmod the permissions on “idchain.pem” with `chmod 400 idchain.pem` before you use it. If you’re getting permissions error on the file, that’s likely why.
Provision Instances On AWS
You’re going to provision 4 instances on AWS for this tutorial: 3 nodes and 1 controller. The controller is where we’re going to be doing a majority of your work. This will be where puppeth reside and it will launch the appropriate tools on the other instances once all dependencies are set up.
- 1 instance of t2.micro Ubuntu 16.04 for the controller
- 3 instances of t2.medium (10 gb) Ubuntu 16.04 for the nodes
Source/More: Using puppeth To Manually Create An Ethereum Proof Of Authority (Clique) Network On AWS


![Bitcoin [BTC] and altcoins will replace $86 trillion worth of](http://628735.kquees.asia/wp-content/uploads/2018/10/alex-radelich-462768-unsplash-e1540802245715.jpg)
![Bitcoin [BTC] and altcoins will replace $86 trillion worth of](http://628735.kquees.asia/wp-content/uploads/2018/10/alex-radelich-462768-unsplash-e1540802245715.jpg.pagespeed.ce.DqrOQSdKKV.jpg)


